By: Maria Kuznetsov, DiY/Guides Staff Writer

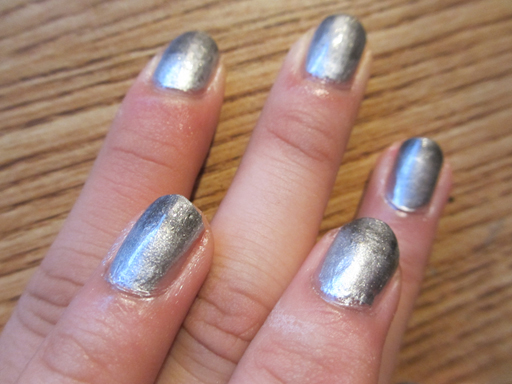
Today’s nail art is one of the simplest, but can look elegant and classy if done right.
For this tutorial, you will need:
- (base and top coat, nail polish remover, cotton swab)
- an index card or impermeable surface
- 2+ colors of nail polish, one lighter and one darker
- a makeup sponge – alternatives: corner of kitchen sponge (communal dish sponges not recommended), paper towel, or cotton swab. A kitchen sponge will produce a coarser pattern, while a paper towel may not create a smooth gradient. However, this can still be an interesting look. A cotton swab may stick to damp polish and leave threads behind.
Let’s begin!
- Prepare your materials. This will prevent rummaging through drawers while your nails are wet.
- Apply petroleum-based product around nail.
- Prime your nails with base coat. Once the base coat dries fully, apply enough coats of the first color to ensure it is opaque. If you are worried about your nail line being visible, your second color should cover it up if it is opaque enough.
- Cut the tip of the makeup sponge in order to have a larger surface area with which to sponge.
- Using the brush, place a few drops of your first color on the paper.
- If painting with a metallic or chrome, to avoid brushstrokes, sponge on the last coat with a makeup sponge.
- Place a few drops of your second color on a sheet of paper or impermeable surface. Take the sponge and dab it in the polish, then dab off excess.
- Press the sponge down on your nail, moving it slightly up and down in order to blend the two colors together.
- Repeat, moving further down the nail for a darker tip.
- If desired, add another color in the same way or go over again, slightly further down the nail to create a darker tone.
- Dip a cotton swab in nail polish remover and clean up any messy edges.
- To finish, apply a clear top coat. This will not only further blend your gradient together, but also seal the design to prevent tip wear.
Thanks to Ellen Zhao for being the hand model in these photos.


Be the first to comment on "Nail Art 101: Metallic Gradient Nail Art"